Brilliant to TASMOTA COnversion
If you are in Australia or New Zealand like me, one of the cheapest and easy to find smart plugs you can get hold of is the Brilliant Lighting Smart Plug. It can be found at Officeworks or Bunnings for less than $20 and is constructed solidly, using dual relays to switch both the live and neutral. Most importantly it is based on the ESP8266 and runs on a branded version of the Tuya IoT firmware and is exploitable for conversion to Tamsmota firmware using tuya-convert. This allows for the device to be freed from Tuya’s IoT network to be controlled via MQTT, web requests or serial and integrated into your home automation setup or IoT configuration of choice.
The following guide takes you through the conversion of a stock Brilliant device to Tasmota firmware over the air(OTA), without the need to crack open your brand new smart plug. If you want to try this, make sure you do it before connecting your Brilliant smart plug to the internet. Once the device connects to Tuya it will be automatically updated and the exploit will no longer work OTA and you will need to open the device to flash it. Although not fool-proof (you can easily brick your device if something goes wrong), you can always flash your Brilliant plug back to the basic Tuya firmware if you feel so inclined.
So far I have tested two approaches to this, one using an Ubuntu 18.04 LTS on a laptop and the other with a tried and tested way using Raspbian on a Rasberry Pi 3 B+. The Pi method has had many more of the kinks ironed out and is the way I would recommend if you want a quick and easy result, but choose the method that suits you best:
1. Flashing the Tasmota Firmware:
2. Configuring Tasmota for the Brilliant Plug
3. Automating web requests from Windows
Flashing Firmware - Raspberry Pi Method
If you are using a Raspberry Pi, the best approach is just to follow the guide over at the Tuya-Convert git and then skip down to Configuring Tasmota for the Brilliant Plug. This approach has been tried and tested and just keeps getting simpler. Over on YouTube digiblurDIY has a great guide following from the Tuya-Convert procedure which is great for beginners.
Flashing Firmware - Ubuntu 18.04 METHOD
Performing the firmware update from an Ubuntu machine is a little more complicated at present and this technique can be a little hit-and-miss:
Step 1: Check that your Wi-Fi hotspot is working
Skip this step if you are sure that hotspot works with Ubuntu on your device. Ubuntu has some compatibility limitations out of the box with certain popular Wi-Fi chipsets used in popular brand such as Dell. To avoid causing yourself a headache with later steps, set up a hotspot from your Ubuntu machine.
On Ubuntu 18.04 LTS for example, this can be done by:
Navigate to Wi-Fi settings
Click the ≡ (options) dropdown and click “Turn On Wi-Fi Hotspot” and confirm that you would like to continue if prompted
Make sure that you can connect to the hotspot using your phone or other device (the name and password of the network will be shown in settings on the Ubuntu machine under Wi-Fi
Step 2: Install Tuya-Convert following the procedure over at the Tuya-Convert git, but use the branched version which has been adapted to work with Ubuntu:
$ git clone -b create-ap https://github.com/kueblc/tuya-convert.git
$ cd tuya-convert
$ ./install_prereq.sh
Step 3: Update WLAN in the config.txt file for Tuya-Convert:
Run iwconfig and identify the name of the wireless network on the machine, for a default Ubuntu install it is probably wlp1s0 or similar
Using a text editor such as vim or gedit, update the WLAN device in the config.txt in the tuya-convert folder in line 2, for example:
WLAN=wlp1s0
Step 4: Update the name of the hotspot name and password to match AP and PASS respectively from the config.txt file (Conventionally it would be easier to just update the config.txt file to match your hotspot, but at the moment some of the credentials are hard coded so the process will fail if you change these in the file.), eg:
AP=vtrust-flash
PASS=flashmeifyoucan
The name of the hotspot is inherited from the Ubuntu device name, there are many ways to change this but the easiest is to temporarily change the device name by going to settings>details>device name in Ubuntu. Make sure that is matches AP from the config file (vtrust-flash)
Change the password of the hotspot by laucnhing: nm-connection-editor and updating the password for the hotspot network
There seems to be a little glitch with editing passwords this way in Ubuntu 18.04 so after doing this, switch off WiFi, then run:
sudo systemctl restart NetworkManagerTurn WiFI back on and navigate to Wi-Fi settings. Once again, click the ≡ (options) dropdown but this time click click “Connect to Hidden Network…” and select “Hotspot”
Check that”Hotspot” under Visible networks shows the Network Name and Password matching that from the the config.txt file.
Step 5: Continue with the conventional flash process from the “flash firmware loader” step over at theTuya-Convert git
Configuring Tasmota for the Brilliant Plug
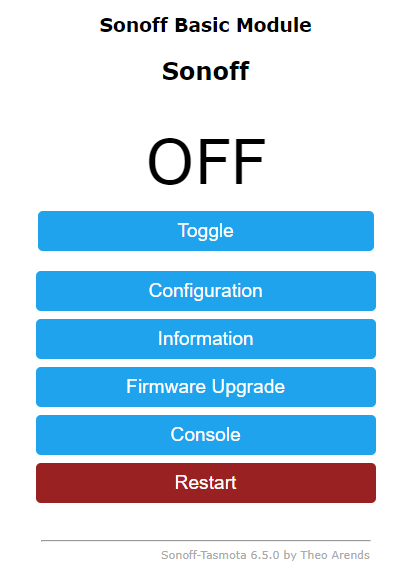
Start by connect to your newly flashed device from your machine (sonoffXXX).
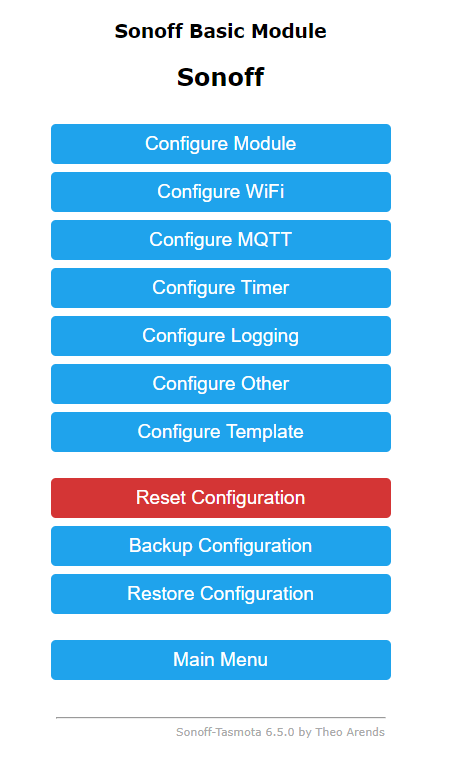
Then “Configure Template”
Create a new template based on the “Generic (18)” template. I named mine Brilliant_Plug. Fill out the template with the details below:
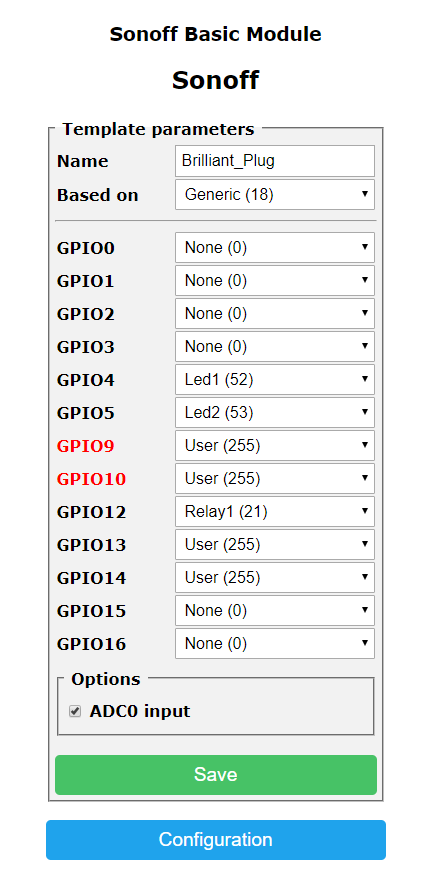
Shout out to vk1ajm and the others over at this thread on github for saving me the time of figuring this all out manually.
After creating the template, click save,wait a few seconds and wait for the main menu to load.
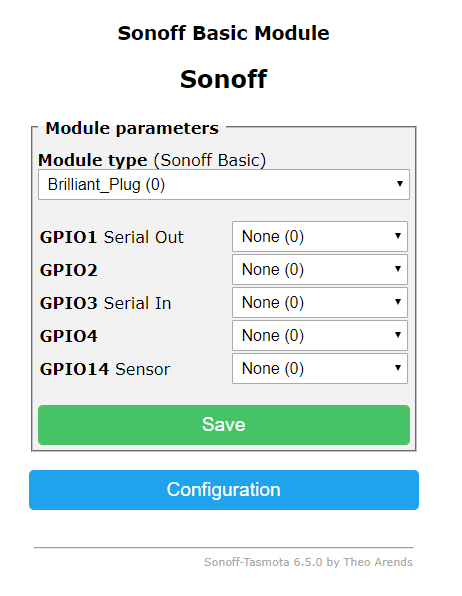
Once again click “Configuration”, followed by “Configure module”.
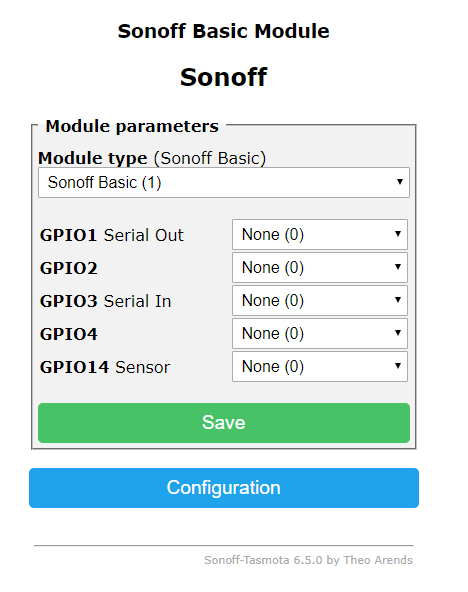
Under module type, select the template you just created (Brilliant_Plug in my case) and click save
Once again, wait for the device to reset and return to the main menu. Once again, click “Configuration” then “Configure Module” and set GPIO14 to “Button1 (17).
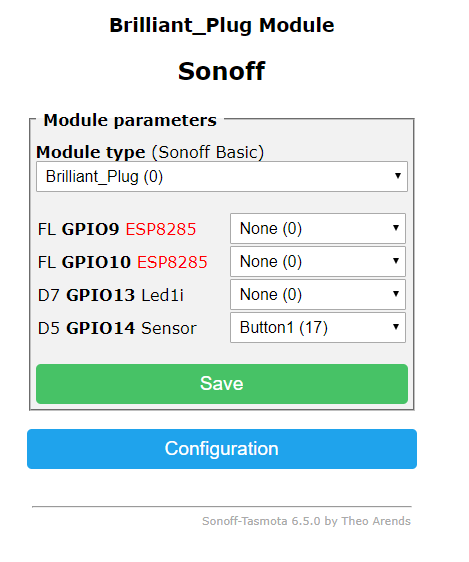
Again, click save and wait for the main menu. The device should now be fully functioning running Tasmota and ready for you to start automating.
Automating web requests from Windows
Just adding this as a little aside since I’ve seen a lot of people over-complicating automation through web requests from Windows. There are many ways to go about this, but one of the easiest is making scripts and calling them from task scheduler.
Find the command you want to call for your device at https://github.com/arendst/Sonoff-Tasmota/wiki/Commands
Make a script to call the action. In this case I made a simple script using:
curl http://XXXXX/cm?cmnd=Power%%20Onby saving it in a .bat extension file using notepad++ or whichever text editor you prefer. Note that if your address has a % character in it, you will need to escape it by adding an additional % (eg %20 becomes %%20 in the address).
You can then call the scripts using task scheduler based on whatever triggers are appropriate.


